
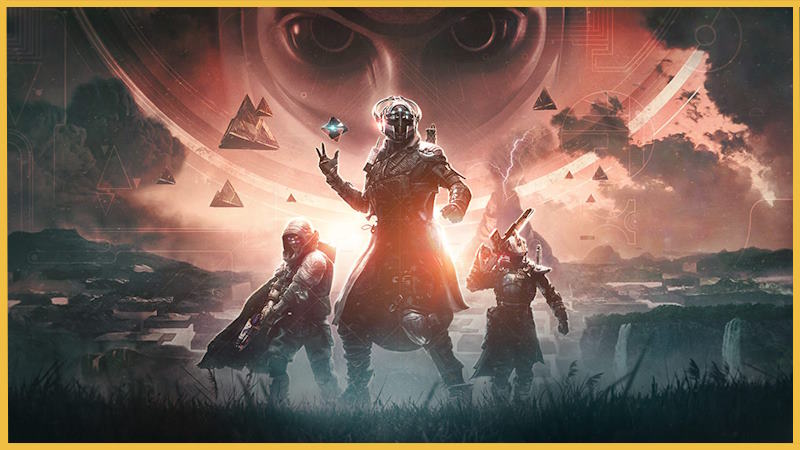
Destiny 2 Salvation's Edge Raid Guide
The "Salvation's Edge" raid in Destiny 2, is a part of "The Final Shape" expansion. This raid is one of the most challenging and intricate instances in the entire game, taking even top-tier raiders hours to complete. In this guide, we will walk you through each of the raid's complex encounters, take a look at the essential strategies, and provide you with tips for each boss. This comprehensive assistance can be extremely useful for players struggling with the raid's difficulties.

First Encounter: Substratum
To start the encounter, ensure everyone is in the main room, pick up the Pyramidal Triangle, and deposit it into the “Deposit Resonance” box.
Phase One
After depositing the Resonance, two doors will open, releasing exploding Supplicants. A "Final Shape Looming" timer starts, and the team will wipe if it reaches zero. Split into two teams of three, each taking one door. The Witness’s hand will cast dangerous triangle zones in the center room. Kill a Quantum Minotaur in each side room to spawn a Keeper of the Monolith on the opposite side. Defeat the Hydra to open more doors and kill the Overload to spawn a Threshold Sentinel Tormentor in the center room. A message, “You are being beckoned back to the center,” will prompt you to regroup and kill the Tormentor, opening more doors.
Repeat this pattern twice: kill a Hydra to open another door, kill a Minotaur to spawn an Overload, kill the Overload to spawn a Tormentor, and then defeat the Tormentor in the center room. Once two Tormentors are killed, the plates in the same rooms as the Overloads will charge and glow, as indicated by the message, “Energy flows into the architecture.”
Phase Two
After completing the above cycle twice, a glowing plate should be on each side. Form three teams of two, with two people on each plate and one in the center. One player on each side locates the first glowing plate, while the other finds the room where the Resonance Conductor pillar is glowing. Step on the first glowing plate to transfer the current to the second plate, then step on the second plate to spawn Pyramidal Resonance – small, glowing triangles around the room. Repeat this process until you see this message: “All resonance has been pulled forth.”
If the chain breaks by stepping on the plate too early or late, or if both players step on the plates simultaneously, the plates stop glowing, and an Omen of the Witness Subjugator appears. Any uncollected Pyramidal Resonance will despawn. Kill the Subjugator to try again.
Each player should collect three Pyramidal Resonances. When the timer is around 40 seconds remaining, close the Resonant Conductor near the plate by shooting the triangle before stepping on the plate. Closing two Resonance Conductors spawns a Harbinger in the center room. Defeat it quickly, close all side doors, and spawn another Resonant Alter to deposit the Pyramidal Resonance, extending the timer by 20 seconds per deposit. Repeat this process three times to complete the encounter.
After collecting your rewards, proceed up the stairs to a large red pillar. Use the lift mechanic to continue and follow the jumping puzzle to reach the next encounter.
Second Encounter: Dissipation
You will enter a wide-open arena with a rectangular field in the middle and three Resonance Conduit pillars with plates on the left, right, and middle sides. Assign two players to each pillar. You'll notice the presence of both Pyramidal and Spherical Resonance, as in the first encounter.
Phase One
To start the encounter, shoot the Taken blight. The boss will spawn alongside Taken and Dread enemies, including yellow bar Taken Knights. Ensure these Knights do not step on the plates, or your group will wipe. The "Final Shape Looming" counter is also present. Kill three yellow bar enemies and it will spawn three Taken blights near your plate. One player from each pair will get the Beckoned to Fight buff when the gong sounds. Kill the blights and collect a buff called “Call for Reckoning”. Once enough blights are destroyed, a smaller blight will appear above the boss. If you have the Call for Reckoning buff, run to the center of the arena and shoot this smaller blight to convert the buff into Stolen Favor. This new buff allows you to read which type of resonance (spherical or pyramidal) needs to be deposited into each pillar. Without this buff, you cannot read the resonance type.
Phase Two
When the player with the Stolen Favor buff looks at the symbol on their Resonance Conduit, it will indicate either a sphere or pyramid shape. Close the Conduit in the same manner as in the first encounter, but this time, you must collect the correct type of resonance. Your entire stack of resonance will convert to the type you pick up last, so you cannot collect both types to close two pillars with one player. If the charge chain breaks, an orange bar enemy will appear, and you can kill it to retry if you have time left. Once all three pillars are closed, head to the center.
Phase Three
After locking the pillars, a box will spawn in the center to deposit the resonance, adding time to the "Final Shape Looming" timer. After the boss disappears, his shields will be lowered, creating a DPS window before immunity kicks back in. Repeat this process until the final stand. More ogres will spawn which will make the final DPS window harder. You must defeat the boss within the given time, or you'll wipe.
After defeating the Herald of Finality, collect your rewards and climb the white cubes to the next area. Another lift will appear, which you should enter and traverse upwards, killing enemies near the Dissenters along the way. A Tormentor will spawn, and you need to kill it to bring down a barrier blocking your path. Continue ascending the monolith, avoiding the Resonant Cylinder, which can instantly kill you.

Third Encounter: Repository
The third encounter in Salvation’s Edge involves managing plates and introduces two new types of Resonance: Cubed and Hexahedral. The arena spans three levels, with progression upward after depositing Resonance into a chest. Each level has three rooms following the same rotation.
To start, a Threshold Sentinel Tormentor and other enemies will spawn around each Resonant Conduit. Killing a Tormentor unlocks the Conduit's plates and spawns turrets. The final blow grants the Stolen Valor buff, revealing the required Resonance types. Players must use the plates to generate Resonance, collect it, and close the Conduits with the correct type. Closing the Conduits spawns a Resonant Altar in the center. Failure to close a pillar summons a Harbinger of the Witness Subjugator, which must be killed to try again, also triggering turret spawns.
Once all Resonance is deposited, more enemies and an Unstoppable Incendior will appear. Killing these enemies unlocks the door to the next level. Completing this process on the highest level finishes the encounter.
Fourth Encounter: Verity
You will enter an arena featuring a large, white room with six red statues resembling Guardians. Initiating the encounter involves interacting with the statue labeled "Free Guardian," while the others can be interacted with to "Dissect." The arena is comprised of inside and outside rooms; inside rooms have three statues each, corresponding to solo players separated from the fireteam. You will see shadow shapes on the mirrored back wall in these rooms.
The goal is to match 2D and 3D shapes using callouts. The 2D shapes are a triangle, circle, and square, while 3D shapes are formed from combinations of these:
- Triangle + Triangle = D4;
- Square + Triangle = Pyramid;
- Circle + Square = Cylinder;
- Circle + Triangle = Cone;
- Circle + Circle = Sphere;
- Square + Square = Cube.
Inside: Phase One
Players enter an arena with inside and outside rooms. Inside rooms contain statues corresponding to each player, displaying either a circle, triangle, or square. Shadows must be enabled to see shapes on the mirrored back wall, which cycle between two shapes or transform slightly.
Players inside must identify their statue's shape and coordinate to ensure the wall displays two of the same shape as their statue. They achieve this by trading shapes dropped by Splintered Curator Knights near the wall. Each player must avoid collecting their own statue's shape and should not collect more than one shape, as this would transform them into a 3D shape.
Once all inside players have matched the wall to their statues, an Ogre spawns, followed by more Knights, defeating these enemies signifies readiness to progress to the next stage of the encounter.
Inside: Phase Two
During phase two players inside must change their statue's shape by depositing the shape they collected from the Knights onto different statues. This process ensures that only the statue matching each player's shape remains with a shape.
The Witness will eventually notice and kill all three inside players, which is intentional. Outside players must then retrieve the ghosts of the inside players and deposit them correctly into the corresponding statues to revive them. Revival must follow a specific left-to-right order; otherwise, inside players will immediately revive to try again.
Once each inside player has two different shapes displayed on their wall, they can escape by killing both Knights, picking up both shapes simultaneously to acquire a 3D shape aura. With this aura, they can pass through the glass wall at the back of their room to rejoin the outside team.
Outside Phase
As an outside player, your task is to manipulate the symbols on the statues outside to match the shapes held by the Guardians stuck inside. The goal is to create a 3D shape on the outside statue that is composed of the shapes not held by the corresponding inside statue. For instance, if your inside statue holds a triangle, then your outside statue should display a cylinder (which is made from a circle and a square).
To do this, you'll dissect the statues by swapping the 2D shapes between them. For example, if one statue has a cone and another has a cube, you can swap their triangle and square to create a cylinder and pyramid.
To dissect a shape, kill a Knight to obtain the corresponding shape, then interact with the statue to remove its current shape and replace it with the new one. Dissecting two statues consecutively swaps the shapes between them, so it’s crucial to communicate clearly about the order of dissection.
After killing all three Knights, an Unstoppable Ogre will spawn. Defeating the Ogre will summon three new Knights. Periodically, the Witness will react to your actions by killing players, starting with an outside player each time. To revive a player, retrieve their Ghost from the back of the room and deposit it on their statue, following the order from left to right.
When the Witness kills all inside players, revive them in the same left-to-right order. If you deposit a Ghost on the wrong statue or in the wrong order, you will die.
Once you've dissected three statues that correspond to the inside players and revived all three inside players, they can exit their rooms and join the outside team to face the next phase together. Ensure the outside statues reflect the shapes held by the inside statues: for example, if inside statues hold a triangle, circle, and square, then outside statues should display a cylinder, pyramid, and cone respectively.
Full Group Phase
When all the players are joined together, 5 of players will be killed. The one player that’s left has to revive the others in order of their statues from left to right. When a player is respawned he can help with reviving others.
Once all six players have been revived outside, the wipe timer will disappear briefly. After this, three players will be selected to return inside, and the cycle of the encounter restarts. You need to complete three full cycles of solving the shape puzzle to progress to the next encounter.
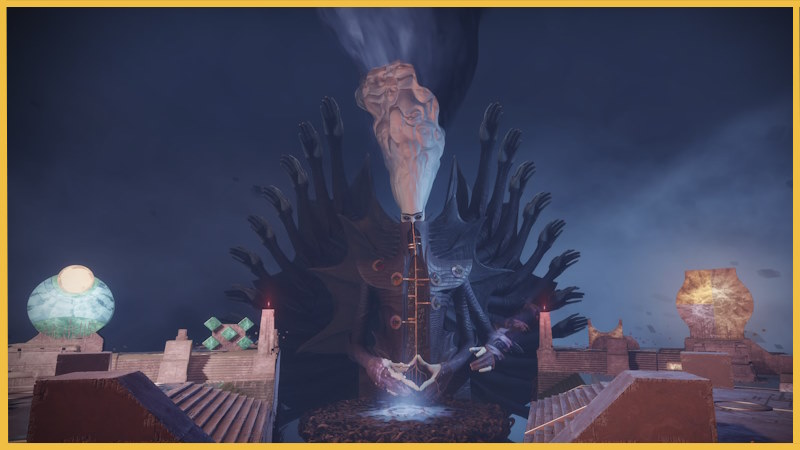
Fifth Encounter: Zenith
Zenith presents a vast, V-shaped platform with the Witness standing at its far end. On the left side, there's a glowing Light stone, while on the right, a Dark stone. Positioned near the Witness is a small island hosting a Well of Light, a crucial feature central to the encounter.
Phase One
The encounter with the Witness involves managing three arms that spawn on each side at the beginning. Each arm attacks with different patterns: bees, lasers, and pulsing triangles, which give Spherical, Hexahedron, and Pyramidal Resonance buffs respectively upon contact. Players step into these attacks to gain Resonance.
Once a player has a Resonance buff, they shoot the corresponding arm to reveal a symbol and colored band indicating the type of Resonance. Yellow (Spherical), Red (Hexahedron), and Green (Pyramidal) bands are matched with the appropriate buffs. Shooting the band grants Glyphbreaker buff.
With Glyphbreaker, players enter the well of light and shoot glyphs on the Witness's chest, removing both Glyphbreaker and Resonance buffs. Breaking a glyph spawns a Subjugator on each side; breaking all six glyphs raises the central platform for the damage phase.
If prompted with "The Witness tests you," resonance pillars spawn in the center requiring specific patterns based on the last shot arm: circle (up arm), square (side arm), triangle (down arm). Shooting around these shapes cancels a wipe mechanic, triggering an arena-wide attack needing a timed jump to avoid.
Manage Resonance buffs from different arm attacks, break glyphs strategically to minimize Subjugator spawns, and solve pillar patterns to avoid arena wipes during the encounter with the Witness.
Phase Two
After breaking the last glyph, two Subjugators spawn and must be quickly eliminated before the damage phase begins. During this phase, the Witness exposes a critical spot on its chest, initiating a damage cycle similar to the Excision activity.
The Witness attacks in a sequence: front left diagonally, back right, back left, and then a platform-wide attack that requires a timed jump to avoid. Its eyes glow as an audio cue signals the need to jump.
Throughout the damage phase, stay on the safe side of the platform to avoid attacks. When the Witness straightens up, the platform lowers, prompting an immediate jump back to the main arena to avoid death.
This cycle repeats until reaching the final stand phase. The Witness briefly becomes invulnerable before attacking faster and more frequently. Players must remain vigilant for attack telegraphs to survive this phase.
This concludes our guide to Salvation’s Edge raid. Hopefully, you’ve learned how to overcome all of the obstacles this raid presents. However, if you don’t want to go through the hassle and difficulty of clearing these encounters, but still want the loot, we have a solution for you! You can check out our Destiny 2 raiding services here, and let us handle everything for you instead

Core Principles
Why Choose Us?
We are constantly improving our services to deliver mind-blowing experiences to our customers for every order, every day
Rated 5 Stars
On REVIEWS.io
Check out our reviews on REVIEWS.io, an independent reviews platform. All reviews are genuine and published in real time.
Read customer reviews
We will contact you and start working on your order within 7 minutes

Every manager, even the owner, has successfully personally completed over 300 orders

P.S. We'd better miss a $10,000 sale, than risk your account
